Faces and Masks
Dates: Wednesdays (February 3 – March 10, 2021)
Time: 3:30-5:30 P.M. (EST)
Number of Classes: Six (6)
$120
ABOUT THE TEACHING ARTIST:
Syma
BIO
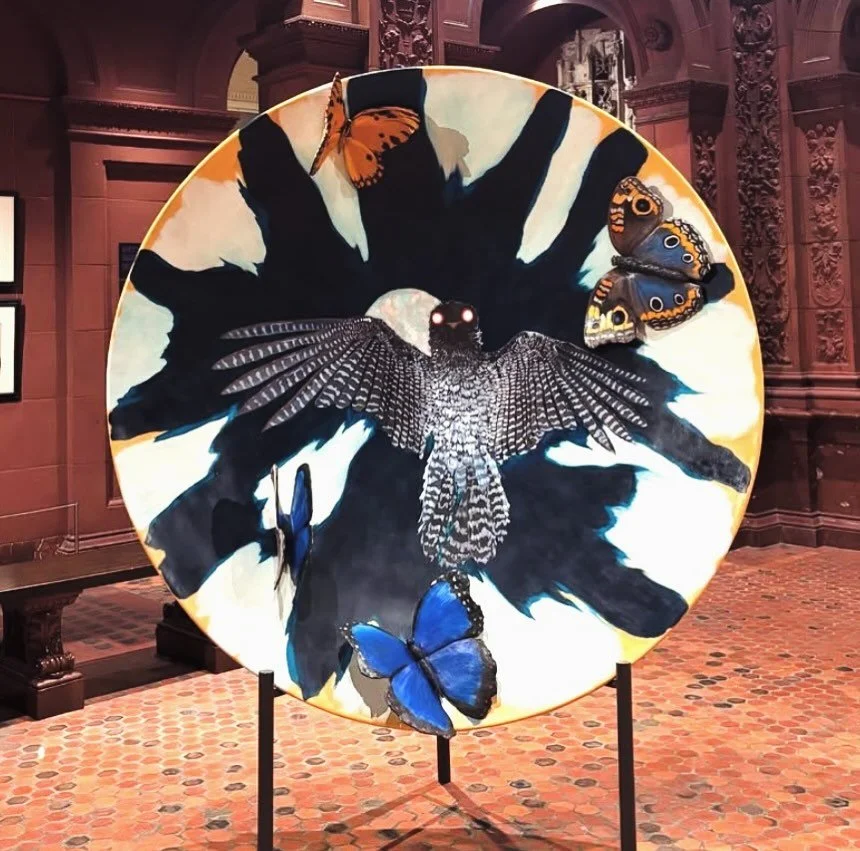
Syma is New York artist who has been working with clay and mixed media for nearly five decades. Primarily working from home since the onset of the pandemic, she is exploring new ways of creating art.
Inspired by ancient artifacts and mythologies, Syma’s interactive/ conceptual clay sculptures, vessels, and gallery installations are her response to wishes, dreams, and worries. Syma’s large scale sculpted panels are permanently installed on walls of public and private buildings in the US and UK, and her ceramic jewelry has been featured at London, England’s Lesley Craze Gallery.
Grants and awards include residencies at MAD Museum; an NEA stipend; an EARTHWATCH fellowship for an archaeological dig in Mallorca, Spain; a residency at A.I.R. Vallauris, France. Collectors include: Michael Heller, of Heller Gallery, NY; Philadelphia University, Philadelphia, PA; Yuko NiiFoundation, Brooklyn, NY; Art Complex Museum, Duxbury, MA
A teaching artist at the Metropolitan Museum of Art since 1999, Syma earned her B.S. in Psychology and Art from the University of Pittsburgh and has continued her training in New York, New England, and the UK.
CONTACT INFO
Email: syma@sculptorsalliance.org
Website: www.symastudios.com
Social Media links:
www.instagram.com/syma_ceramic_artist/
https://www.artsy.net/artist/syma
https://nyartistscircle.com/artists/Syma
COURSE DESCRIPTION
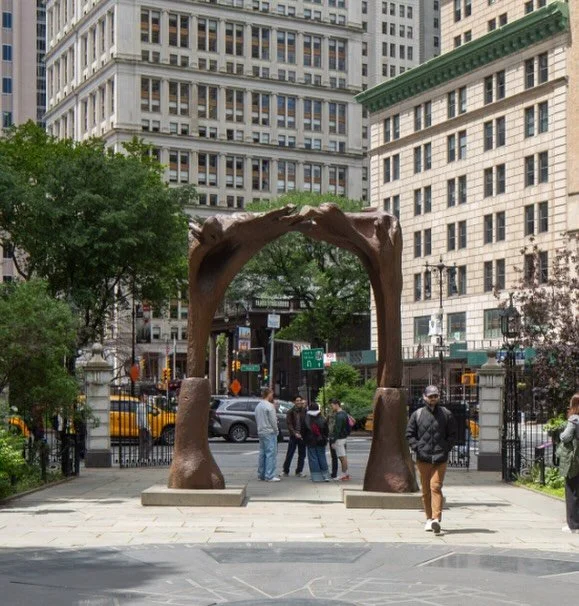
Masks throughout history and across many cultures, have been created for decorative adornment and display. Miniature as well as larger-than-life masks have been used in celebrations and healing or transformation ceremonies. This 6 week course is open to students with any level of art-making experience. We will use plaster gauze bandages, air-dry paper-clay, and mixed media. With your own desired transformation or celebration in mind, you can choose to make a 3-d selfie or an imaginary character.
This course is intended to stimulate your curiosity and imagination as we explore and extend possibilities of materials and techniques presented. Join us and see what your own magical masks might look like.
Learning Outcomes:
- Viewing, considering historical and contemporary examples of decorative and ritual masks.
- Consider your own desire to transform or celebrate…
- Explore possibilities and challenges of working with air-dry paper-clay as alternative to traditional mud-based clays.
- Learn how to use plaster gauze bandages, and then make a life-mask to be used as a press-mold.
- Learn how to use ‘fimo’ (or ‘sculpey’) polymer clay to make oven-baked small press-molds from found-objects chosen for shape, texture, personal meaning.
- Learn how to use press-molded multiples of small found objects to embellish your mask.
- Explore possibilities of adding color by painting, staining, drawing on paper-clay.
- Explore possibilities of collage and assemblage on paper-clay, adding mixed-media found objects and found paper.
- Stimulate your curiosity and imagination and share challenges as well as new ideas.
- Have fun as you play with possibilities and ‘think like an artist’…
COURSE TIMELINE
WEEK 1
Intro /welcome/doodle drawing
Power-point: mask images.
Demo: Plaster gauze of hand.
Students make mold of hand.
Preview: pressing clay into small mold.
Homework: Find small personal treasures to cast.
WEEK 2
Power-point: more mask images, emphasis on details.
Demo: Fimo mold-making of a detail.
Students make polymer clay mold of a detail, oven-bake during 10 minute class break.
Demo: pressing paper-clay/ making “experimental pancakes” for later color tests.
Students make paper-clay multiple pressings in polymer clay mold, plaster gauze hand mold, and 7 paper-clay “pancakes”.
Homework-a: continue making polymer molds, paper-clay pressings, and paper-clay pancakes.
Homework-b: photograph pressings and email images to instructor.
WEEK 3
Video-demo /live-demo: face life-mask making.
Students make plaster gauze life-mask mold of own face or of friend.
Wash-up during break.
In class: sketch multiple real/ not real faces and doodle some possibilities for adding mask details.
Preview of options for adding color or collage...
Homework-a: optional continuation of the in-class doodle sketches, photograph and email images to instructor.
Homework-b: gather found images for collage and found objects to embed or attach to mask.
WEEK 4
Power-point: more mask images
Demo 1: pressing paper-clay into plaster life-mask mold.
Students press paper-clay into plaster life-mask mold and remove later in class, if it is ready.
Demo 2: (after 10 min break): adding color to tests.
Students add color to their paper-clay tests.
Preview: Considering other options before paper-clay is dry, refining before and after clay dries.
Homework-a: remove paper-clay from plaster life-mask mold, if not done in class..
Homework-b: students photograph their decorated paper-clay tests and send images to instructor.
Homework-c: continue to gather found images for collage and found objects to embed or attach to mask.
WEEK 5
Power-point: images and discussion of students’ decorated paper clay tests.
Demo: adding found paper and found objects.
Students add color and found paper/found objects to their paper clay masks.
In-class Q and A… and brainstorming possibilities.
Homework-a: continue working/ experimenting…
Homework-b: students photograph their works-in-progress and send images to instructor.
WEEK 6
Power-point: images and discussion of students’ masks, mask-making experiences, and intentions for magical use.
Continuation of in-class work time for any final touches.
Celebration and pose for a grand masquerade zoom photo.
MATERIALS/SUPPLIES AND TOOLS
-PLASTER GAUZE BANDAGES- ONE single roll: https://www.amazon.com/gp/product/B000F5VHQQ/ref=ox_sc_saved_title_2?sm id=A3QR97XYKD2ID2&psc=1
-VASELINE to cover skin being cast.
-Table cover.
-Plastic Garbage bag to be worn when face mold is being made. -Head scarf when casting face.
-Mirror if casting your own face.
-Scissors.
-Wet/ damp rags.
-Paper towel or old towel to throw away.
-Paper plates or plastic plates to organize tools, supplies. -Disposable Water Bowl for wetting plaster strips.
-Water containers for use at other times, can be re-used.
-Old cotton fabric or tea towel for drying surface for paper clay.
-Fimo or Sculpey POLYMER OVEN_BAKE CLAY- 2 oz or more (Any color but not white): https://www.amazon.com/Sculpey-Polymer-Clay-Ounces- Granny- Smith/dp/B0027A76DU/ref=sr_1_18?crid=CXHUNE5OAN9D&dchild=1&keyword s=sculpey+iii+clay&qid=1607978526&s=arts- crafts&sprefix=sculpey+III+clay%2Carts-crafts%2C159&sr=1-18
-PAPER CLAY (16 oz or more): https://www.amazon.com/gp/product/B0013J0HI2/ref=ox_sc_saved_title_1?smid =ATVPDKIKX0DER&psc=1
-Sketching paper and favored sketching tools.
-Paintbrushes. Favored size, appropriate for paint or glue or refining edges of paper-clay.
-Favored color pencils, inks, stains, paints for adding color to air-dried paper clay masks or embellishments added to masks.
-Found paper. ( sentimental value encouraged)
-Found objects to cast or add directly. ( sentimental value encouraged)
-GLUE choices might include: Elmers, PVA, liquitex ultra matt medium
-Optional: any favored clay sculpting/ pottery TOOLS. OR substitute with: paper clip, coffee stirring stick, wooden skewer, point of compass.
-SPONGES for smoothing clay or daubing on any inks, stains, paint. -Some magical intention, curiosity, and imagination...
-Some magical intention, curiosity, and imagination...
LIST OF POSSIBLE RISKS OF SELF-INJURIES
Cuts
Abrasions
Allergic reaction to materials
Special care must be taken, stated instructions must be followed, when applying vaseline and then plaster gauze bandages to face or body parts. Precautions for clean up must also be followed carefully.
REGISTERING TO THE CLASS STUDENTS AGREE WITH THE REGISTRATION AGREEMENT AND RELEASE.